Today, much of the audiovisual (AV) setup is visual, with a video system being an important, almost ubiquitous part of the AV mix. However, when you install an AV solution, including a video system for your client, it is imperative that you let them know when the system is ready for use after installation.
If you do not verify the performance of video systems, the client will see the flaws in your AV solution. Video systems comprise many different components, each with its own set of parameters. If you cut corners in one area, it can have a ripple effect.
You should test certain video performance characteristics BEFORE officially handing over a video system. These characteristics are:
Ensure that a projected image will fit the user’s projection surface. The projected image should be free of overscan or underscan, and should be properly aligned on the screen. To verify this, take a look at the image and use a test pattern to check for any white areas where the image is not projected. You also need to report your findings, for which you can take a photograph of the screen. This will show the proper alignment and fit, and you can attach this to the verification report.
Check the geometry of a projected image to ensure proper shape and aspect ratio. You need to ensure that the image is free of any distortion, such as stretching, keystone, and a barrel/pincushion effect. You will need to use a grid test pattern to test for these conditions. Analyze the grid to ensure the correct aspect ratio while also observing the uniformity in the pattern. Ensure that it is free of curves or distortion. You can use circular test patterns as well. You will also have to test at different resolutions, based on how the customer intends to use the system. Attach a photo of the system to the report.
Ensure correct and accurate color representation. You need to use a test pattern, such as a high-definition (HD) Society of Motion Picture and Television Engineers (SMPTE) bars. Using this test pattern, you need to adjust the brightness, contrast, chroma, and hue in order to obtain the correct colorimetry. You can also a colorimeter to measure and verify the colour, gamut, chromaticity, gamma, display brightness, and white point of the image. You need to record the precalibrated state of the image and record any adjustments made to the final image.
Find a balance between the black and white levels in an image. This is a key part of ensuring proper image projection. Refer to ANSI/INFOCOMM 3M-2011 for specific guidelines. This standard helps to measure the luminance of black and white blocks on the screen and calculate the difference between the two, referenced as a ratio.
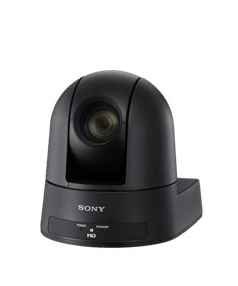
Prior to firing up the camera, ensure that it is fully operational and mechanically sound. You should view the camera through the lens and test it as if it were recording. You will need to test and confirm that the camera is properly mounted and operates in a consistent and reliable manner. This includes testing the pan-tilt-zoom (PTZ) function to ensure that the camera operates smoothly as it moves around. All cables should also be harnessed. Test the camera zoom and focus to ensure that they are properly calibrated and that the image is correctly framed and focused.
Like audio, a video system is just one of the many pieces in the AV puzzle. You now know the characteristics you need to check for before handing over a video system. Do check for these characteristics and ensure a high-quality, seamless video system for your clients.
You can know more about whether your video system is functioning properly. For more information on how to design and install an appropriate video system for your home or business, contact Actis at 022-30808080 or at contact@actis.co.in.
(Content courtesy: www.infocomm.org and Images courtesy: www.samsung.com and www.pro.sony.com)